The P-Shine Japanese manicure is a natural, nourishing manicure process from Japan which leaves you with smooth, shiny, healthy nails (no polish) that lasts for two wees.
I cannot understand why there isn’t more about this kit, as it’s truly amazing.
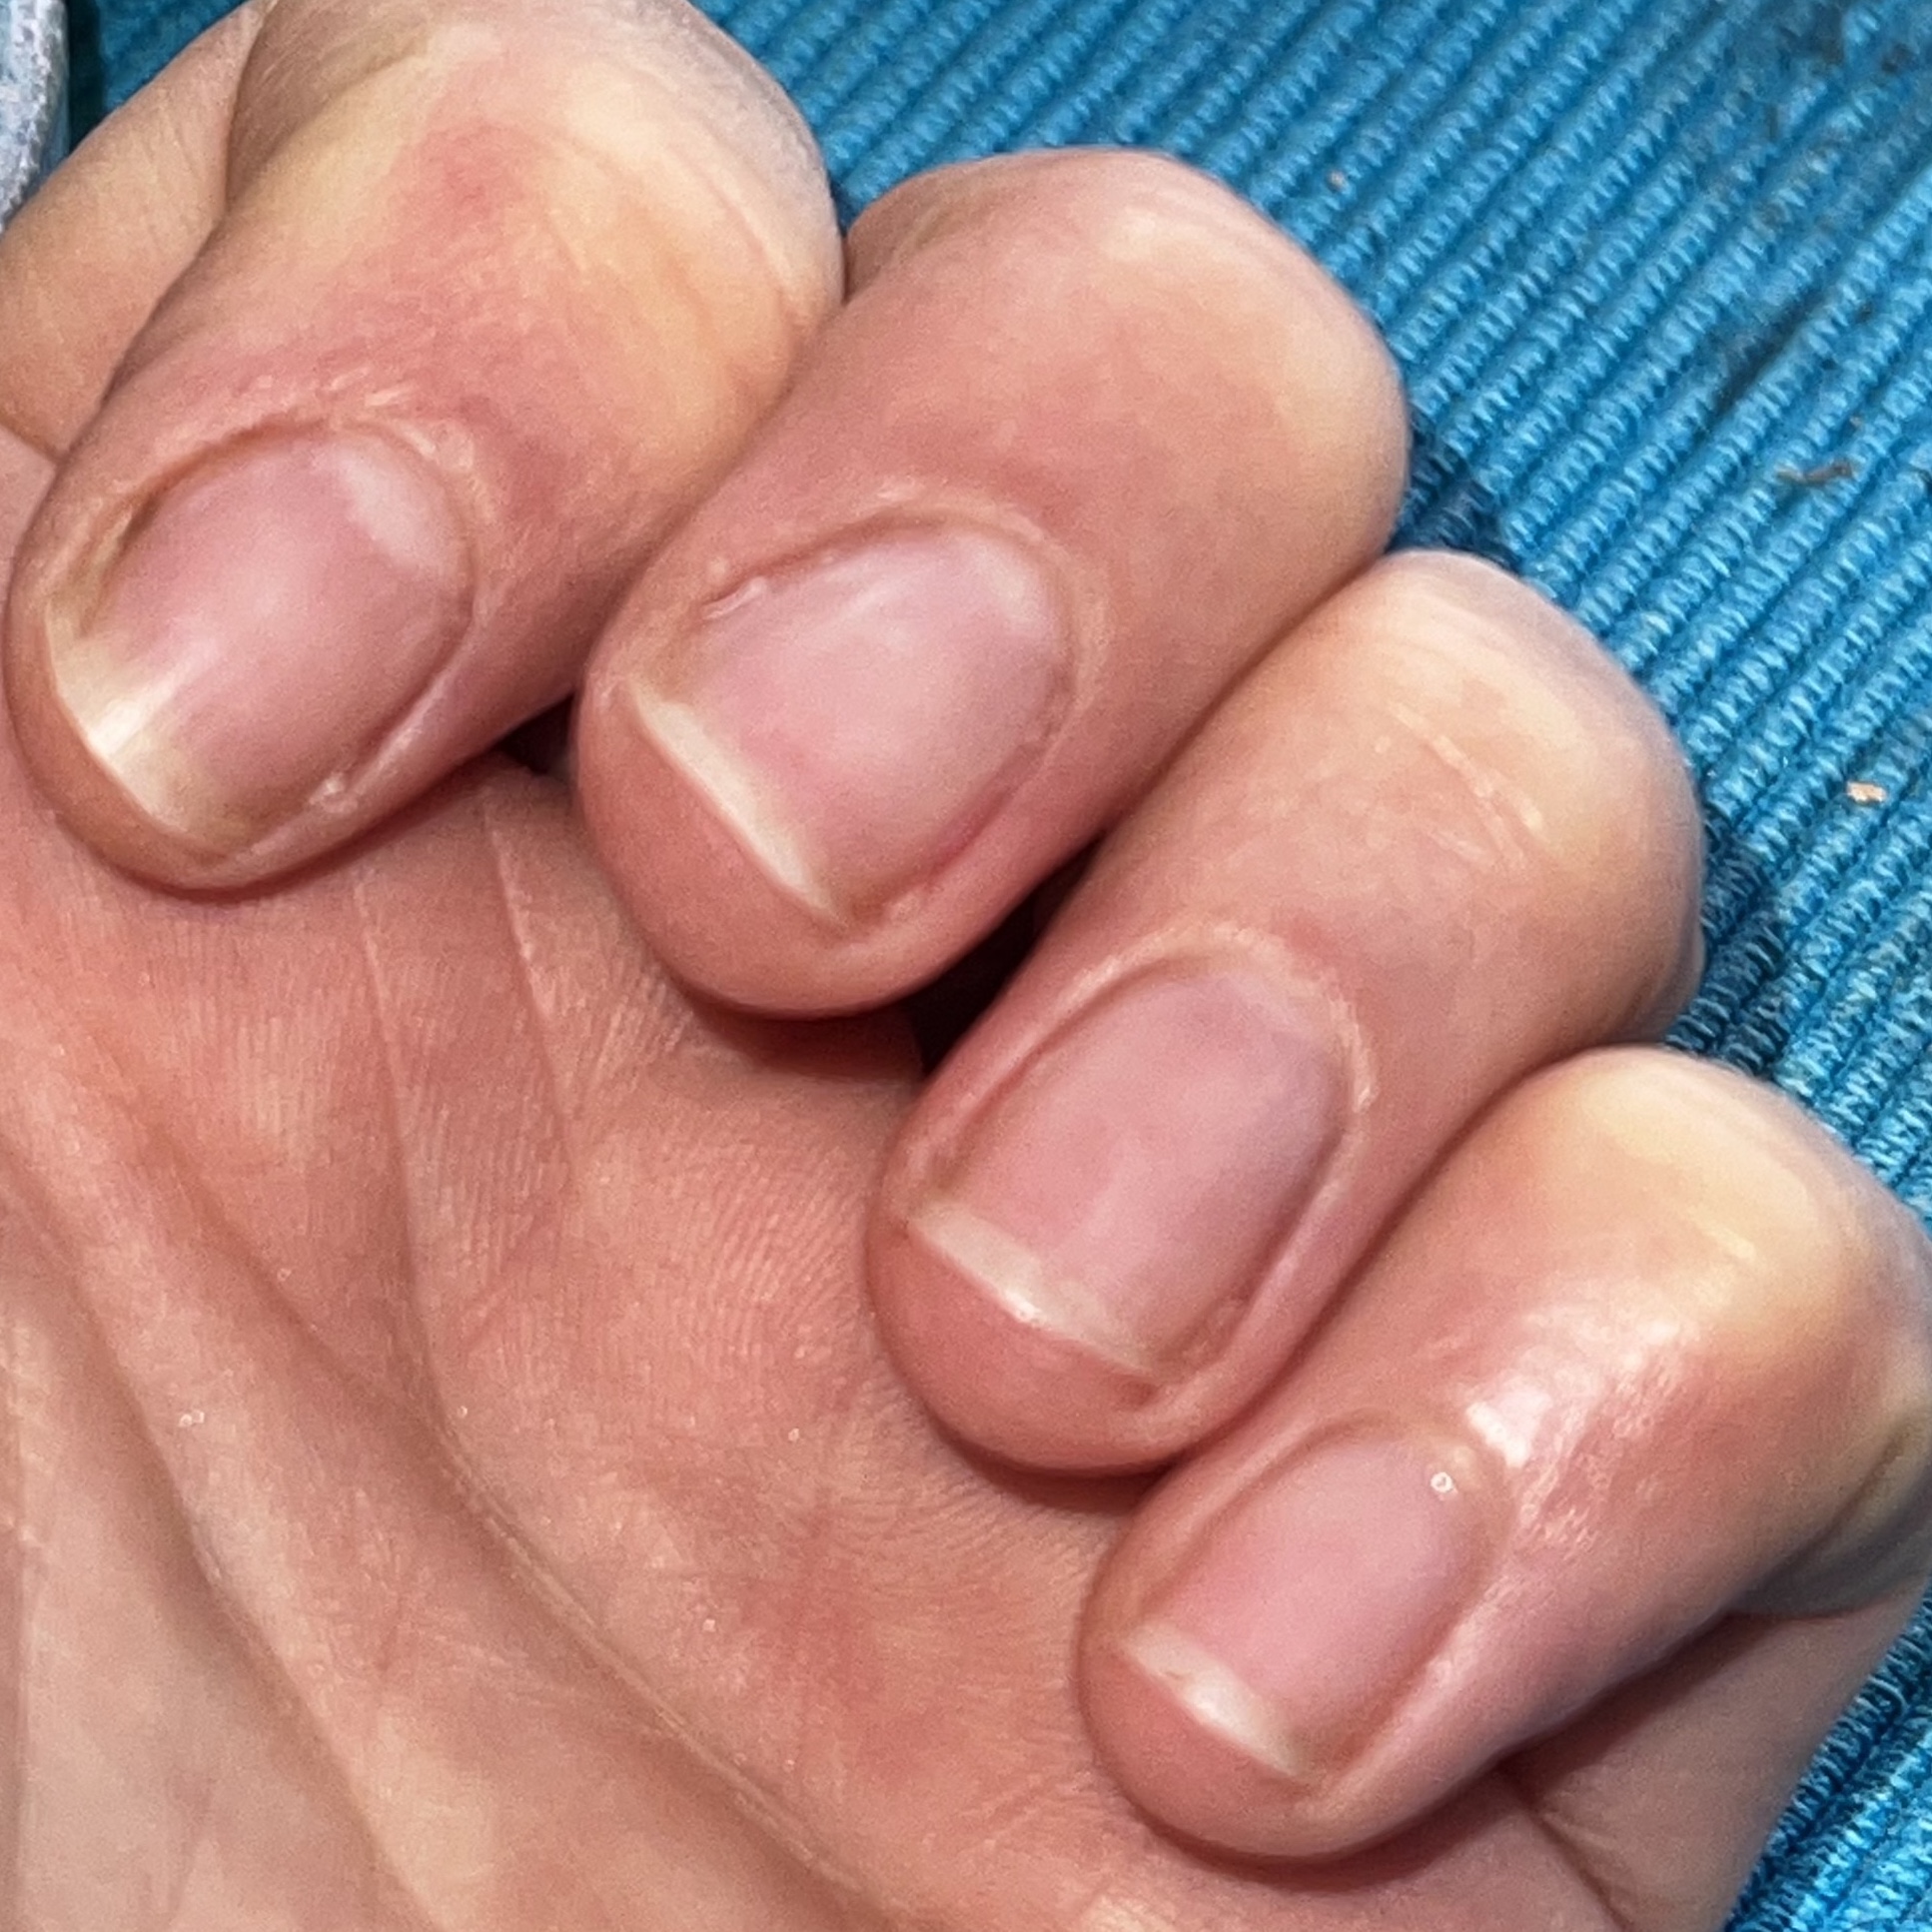
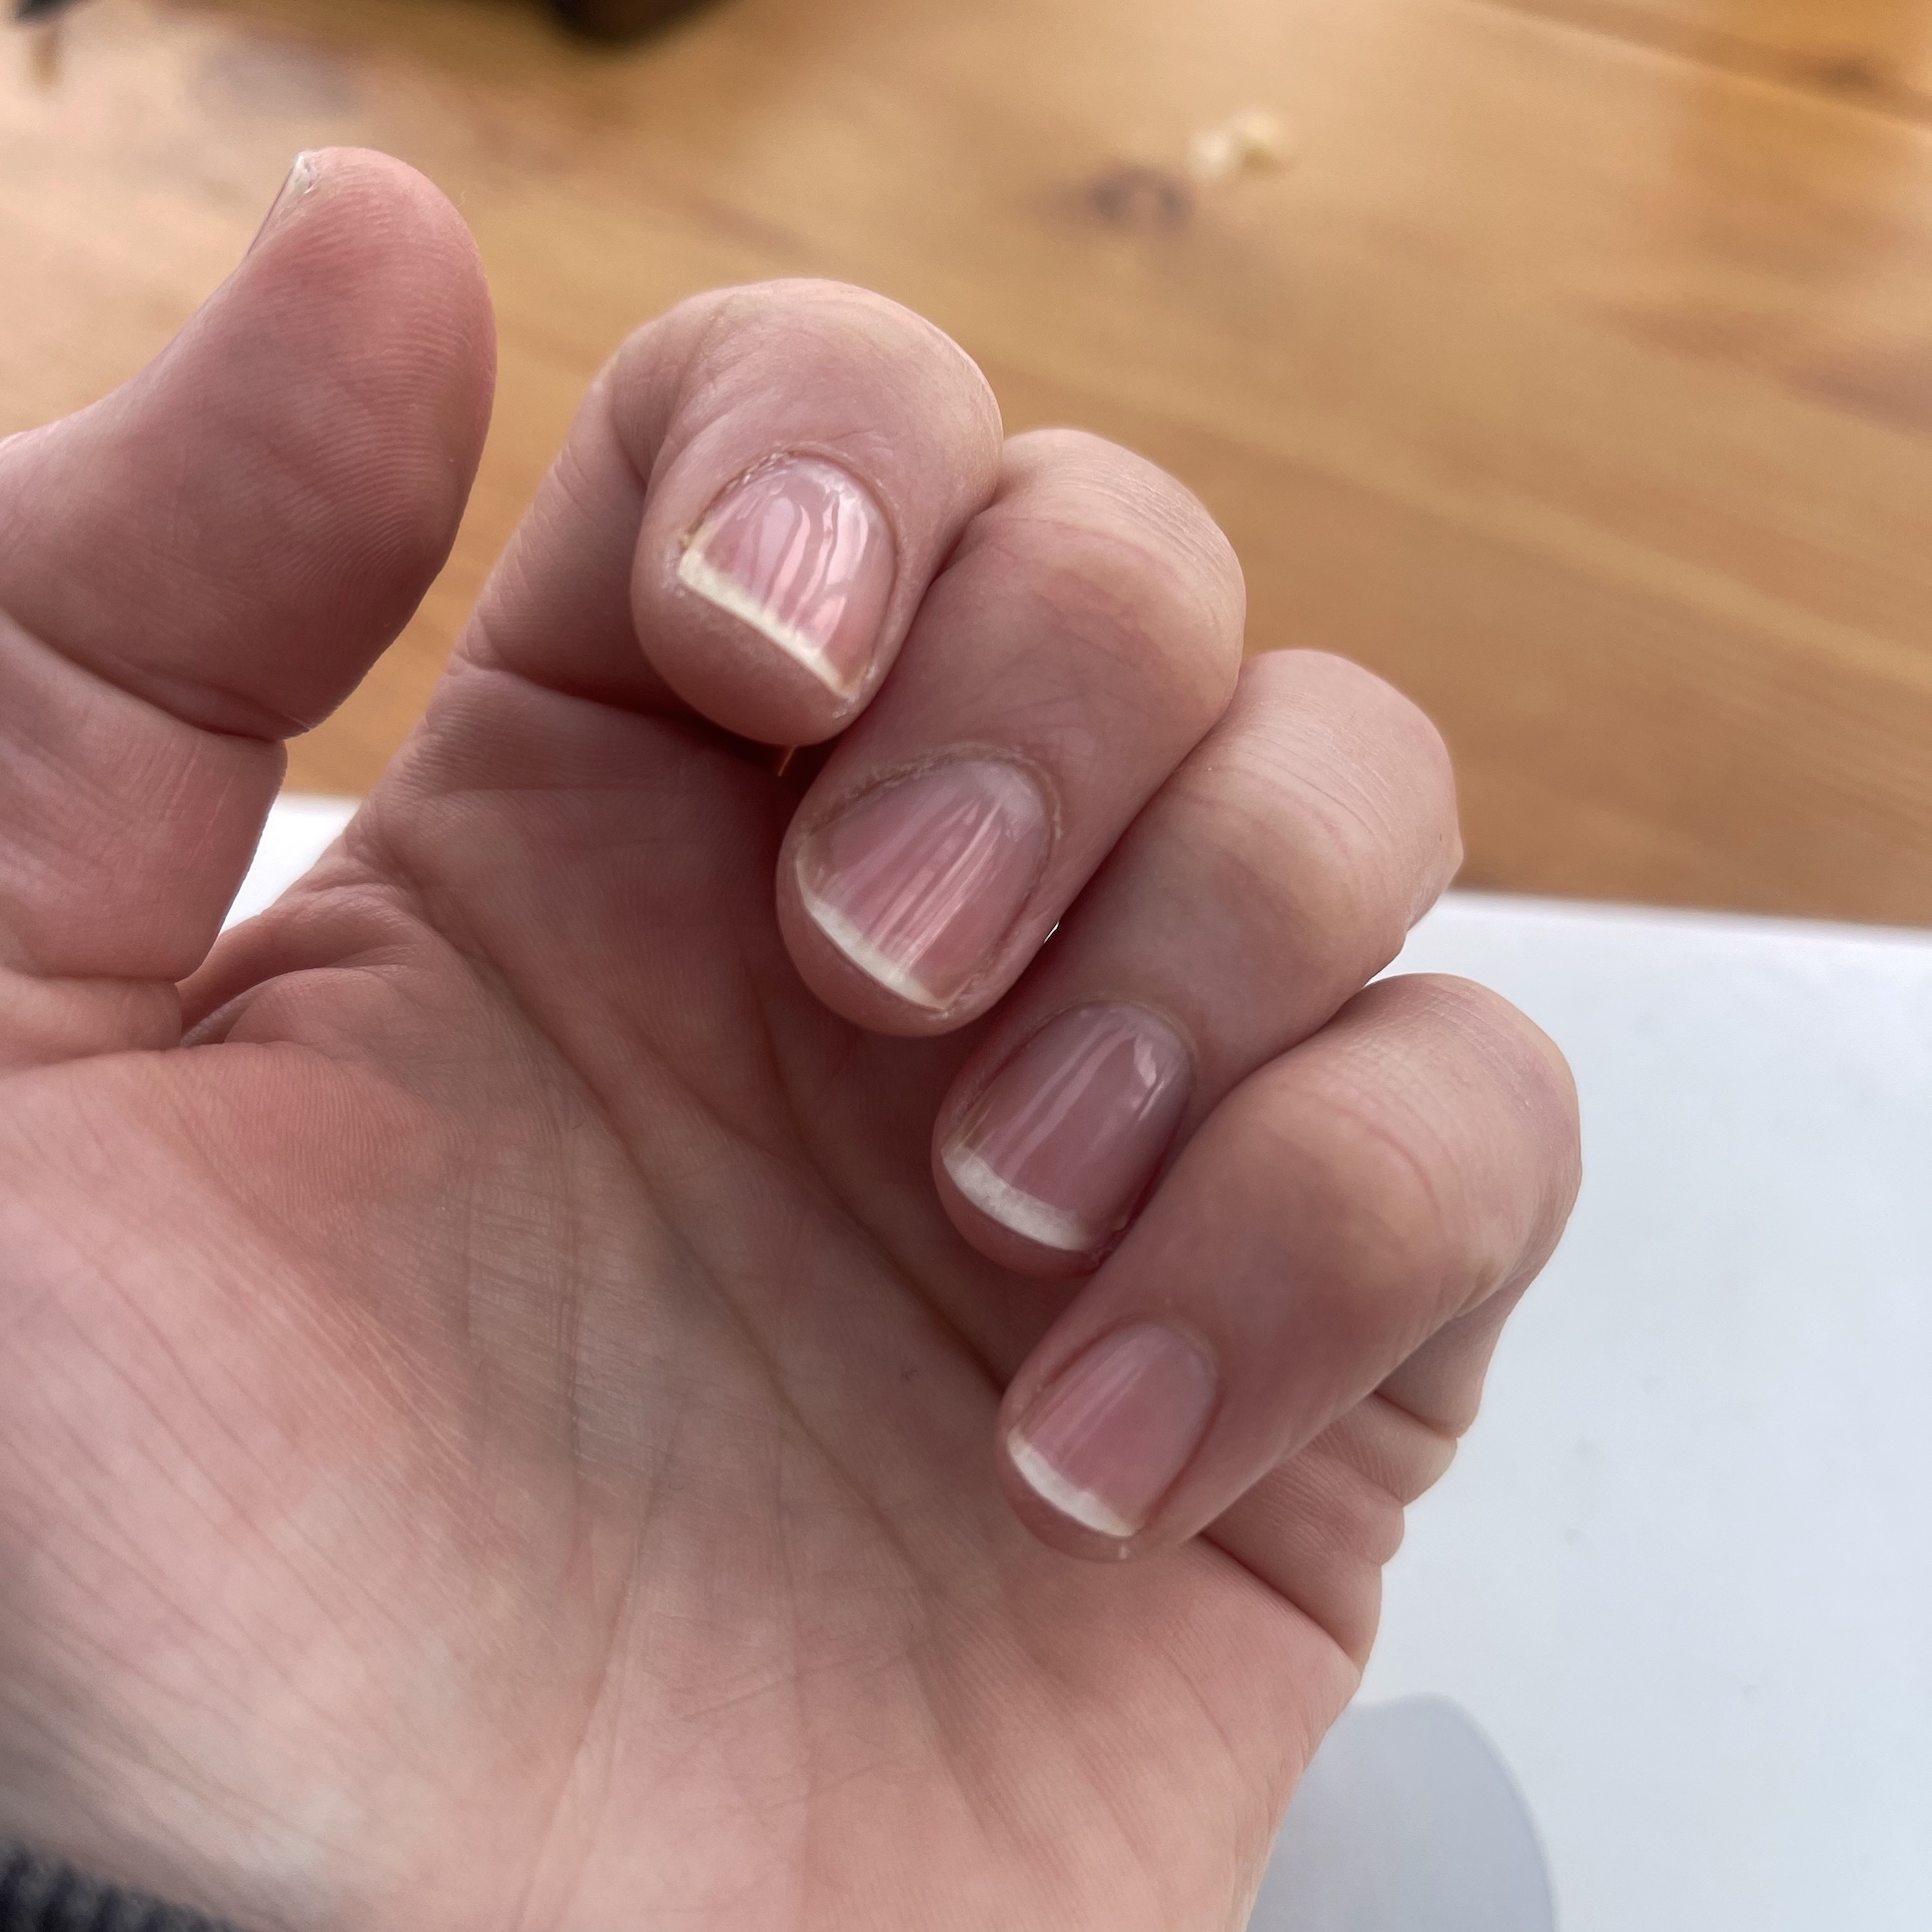
My nails have always, always been awful. Thin, soft, weak, thin, ridged and so, so flaky. I can peel entire nails off. Or I could. Now, they are shiny, mostly stick together (I’ve only been at it a couple of months) and are growing!!
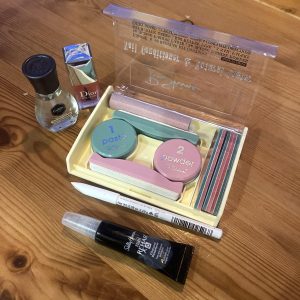
The P-Shine kit was £36 from Amazon when I bought it (early 2023). There are dupes for less, but the reviews aren’t great. Yes, £36 seems a lot, but I was sold on the before and afters I’d found. So now I have my own to add!
It’s quite a small kit, but you don’t use loads so it lasts ages.
I love that it’s gentle and natural. I am frankly horrified by cuticle cutting (link to reasons not to!!) and rough pushing back of cuticles…and the way people file their nails as if they’re sawing a tree trunk makes me wince. Scraping off gels or picking off falsies also gives me the ick. I’ve only once been for a manicure, and I’d still rather do my own. I have to be super gentle.
Just to note I have tried all the supplements, products and procedures out there. I love polish and nail art, but my nails are so weak I’ve never had gels or acrylics or anything like that. Honestly, I think they generally look what they are – fake. I’ve seen some utter scrubbers in tracky daks with unwashed hair with these long, perfect, glittery talons, as well as slick-looking rich chicks, and think it’s too try-hard on anyone. I personally just don’t like the look. My nail style is pops of contrasting bright colour or neutral and classy. I think the donut-glazed look is lovely, and the new (or revived) trend for nude #cleangirlnails is on to something (Elle says so, not that I’d spend £160 on it.)
Tip: get yourself a cute little lap tray for your kit, so you have something to brace your fingers on and so the paste/powder residue doesn’t go all over the place.
Process
First up you can use a cuticle exfoliator like the Sally Hansen one I got from Beauty Outlet.
Then you use the green side of the file to shape the nail. I don’t use these, as I prefer a glass file.
Use the pink side to buff the nail smooth, unless like me this means you would soon be on the nail bed! The instructions say not to do this step if your nails are thin like mine. I have used it for some weird little dints and some of the worst ridges, but you gotta be super careful.
Now the magic – get the green buffer and scrape up a bit of the green cream. I use the white applicator and just fill the tip with the stuff. Spread this thin on one end of the buffer up to a nail’s width. Then apply in one direction to the nail. You have to press and push it in, then buff gently but firmly. About ten passes, and you’ll see the shine. Carry on until it’s gleaming. You’ll be so pleased with the effect!
This also stimulate the nail bed, so helping growth. I tried a more traditionally shaped buffer but came back to the ones supplied. I was trying to avoid buffing my cuticle skin, but you can’t avoid this totally.
I was worried when I bought this that it would be coarse, and would be exfoliating/buffing a layer of nail off. It doesn’t, as far as I can tell. As I say, my nails are stronger. I don’t know what magic it is but…it is.
The list of ingredients is fab. Mostly natural: vitamin A and E, keratin, beeswax and silica from the Sea of Japan.
The kit box is so cute. It looks like 70s plastic, that beige colour that my first hairdryer was. Kitsch, retro, but perfectly up to date in its method.
Once you’ve done one hand, wipe off the excess with the little pink cloth.
Then do the other hand. I always make sure I’ve pressed plenty into the nail tip, to help prevent splitting etc. And the half-moon, where the regrowth is.
Then you take the pink powder onto the pink buffer. You can just dab it onto the end. Check the leaflet for the best way to hold the buffers.
I haven’t found any great difference with using the pink stuff. It’s supposed to impart a pink colour to the shine, but doesn’t do much for me. Not a problem really, as the effect is so lovely anyway. I gather it just seals the paste in.
Then wash your hands and apply cuticle oil and hand cream. Slug overnight if you want, then wake up and remember – oh! My nails are perfect!
If I’m going out or something I like to clean under the nails then use a white nail pencil under the nails. It looks like a French mani, but very understated and cool. And it won’t chip, because it ain’t polish!
I find it lasts about a week. I type a lot, swim, wash dishes (with gloves!) and so on – unless you are a lady of leisure it’s unlikely to last two whole weeks. But it’s such a lovely calming soothing piece of self-care, I’m totally happy to watch an episode of Outer Banks while buffing away.
It doesn’t take that long though – you can do a 15-minute job if you want. I’ve just never hurried it.
Yes, you can use polish on top. I like OPI Nail Envy, which I always put on if I’m working, or the classic Dior Nail Glow. My fave nude is Chanel Ballerina, and it’s well worth the money.
I have also started to bother with the rest of my hand care again. Cream, oil, taking iron supplements (I’m veggie) and getting my vitamin D and calcium. I’m also having collagen protein every day for lots of reasons, but I do hope hair, skin and nails will benefit!
Hope that answers some of the questions I had when I started P-Shine. If you’re not sure, try it – if it works for my hopeless nails, it will for you.

One thought on “P-Shine Japanese Manicure”
Thank you for this. I bought one from Amazon yesterday and saw your review. Your nails look really healthy, which is the style I’m after, as I’m tired of polish chipping after just two days. Thanks also for the very clear instructions on how to use it, looking forward to giving it a go tonight once it arrives.